

Strawberry Mochi “DIY”fuku With Toasted Rice Ice Cream
By: Jessica Delph
Can you think of a satisfying way to beat this summer heat? To top it off, with something sweet? Strawberry Daifuku is a popular spring dessert composed of plush mochi, juicy strawberries and sweet red bean paste. Let us carry this dessert into summer, shall we? When this magical treat is ready to eat, you’ll find there is no better duo than strawberry that perfectly balances the toasted rice sweet cream. Our ice cream variation on the traditional strawberry mochi is super fun and easy to recreate. If you’re feeling ambitious, you’re welcome to make your mochi dough from scratch, but today we’re going to show you a way that’s much quicker and without the mess.
Ingredients
Makes 1 serving
3 to 4 small to medium sized strawberries ( the smaller the better )
1 pack of rice paper wrappers
1 to 2 scoops of Toasted Rice flavor ice cream
1 tbsp of potato or corn starch
Tools
A silicone mold, of any shape will do( as long as it can house the strawberry), which I used a 2”𝘅2”𝘅2’’ dimensions ice cube mold for this. ( review pro tip below ٖ )
Prep
To start, let us talk about strawberries. To keep them at their best, looking lucious and radiant we have to prepare them carefully. Do not wash your strawberries until you are ready to use them. To keep them at their prime, start by rinsing off your little strawberry gems thoroughly. I like to use the vinegar wash method. Fill a bowl with water and vinegar, with 1 part vinegar to 4 parts water ( 1:4), This means ⅓ cup of vinegar for every 1 ⅓ cup of water. You can adjust the amount as needed for how much strawberries you are cleaning ! Let strawberries sit in water for 15 minutes. Give one final thorough rinse off under running water and pat gently with a towel to dry. As pictured I do not hull or cut off strawberry stems as they are edible and pretty, however feel free to set them free if that is your preference.
How To Do It
The assembly is foolproof ! With your silicone mold ready you will first start off with a layer of “Toasted Rice” ice cream. If you do not have a silicone mold that is the same height of strawberry do not worry, see pro tip below. The kitchen is your safe space to create and enjoy !
Take a small spoon or baby spatula and layer mold with ice cream about ⅓ of mold height. This will be our foundation for the strawberry. You will then burrow your strawberry snuggly in the middle of ice cream. You want it fixed in the middle before putting it in the freezer for the 1st freezing treatment. Put strawberries in the freezer for up to 1 hour. ( Do not forget to place the pint of ice cream back in the freezer as well for the time being).
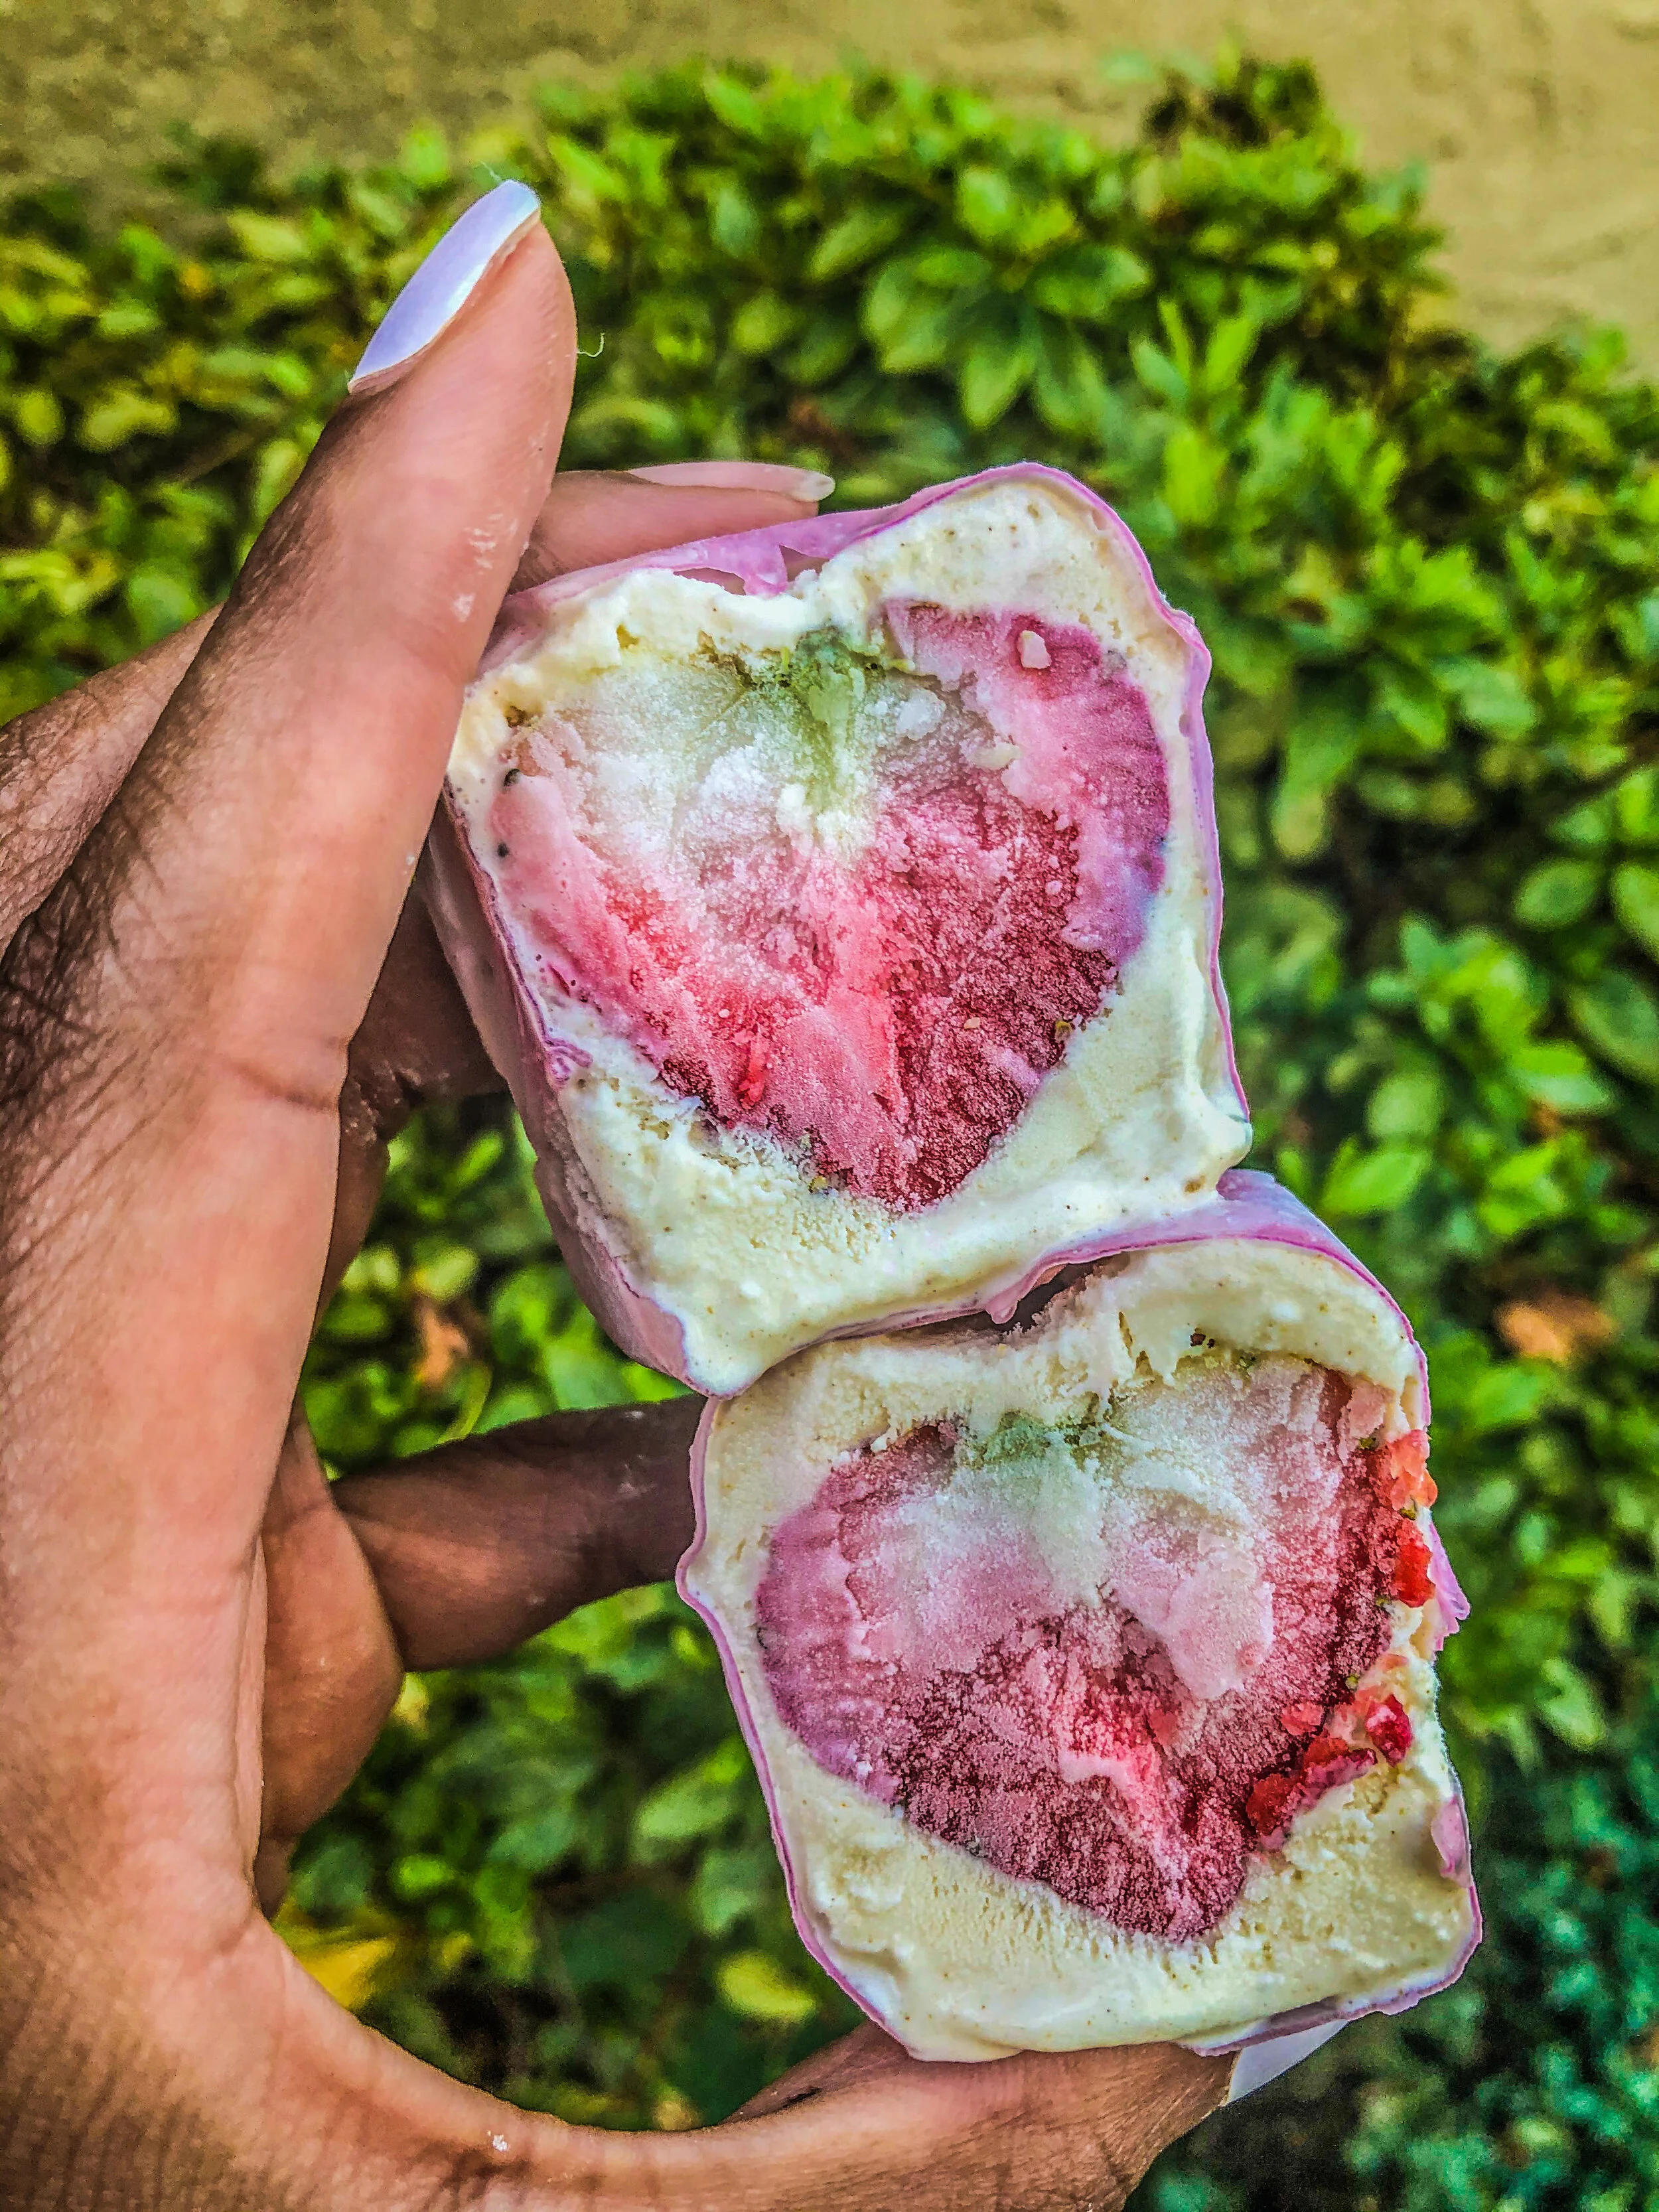
Take silicone mold out of the freezer, give the strawberry a light tap to make sure it is quite fixed. Scoop and layer remaining ice cream around the strawberry to fill in the gaps. Our mission is to encapsulate the strawberry in ice cream, and finally cover the top of the strawberry with ice cream. We do not want to see it at this point. Place back in the freezer to set 1-3 hours or can be left overnight if serving next day.
For this next step make sure you are ready to serve immediately( freezing the wrapper makes for a very rigid texture). Take two, I repeat two wrappers and dip to saturate in lukewarm water to make them pliable. In this case because we are using it for a cold treat, it is ok to reconstitute it in lukewarm to warm water. You will feel it soften as you work the wrapper. Do not worry. When the wrapper is soft it is VERY sticky, place it on a cutting board. Next, pop out your encapsulated strawberry and place in the middle of the wet rice wrapper. The last few steps will happen relatively fast since ice cream does the unthinkable outside of the freezer ( even I melt when it is too hot). You will fold the wrapper around it and place it seam side down (review pro tip below₂).
After covering all strawberries, pour the cornstarch in a bowl and dip mochi for the dusty finish. I like to serve this up sliced in half. With a creamy matcha latte ( iced or hot we do not discriminate) in one hand and strawberry mochi in the next. How do you like yours served up ?
Pro Tip
If you do not have a silicone mold, you can use a mini muffin tin lined with cling film, any shape will do as long as depth and height cover the small strawberries.
2. When folding the rice wrapper around the strawberry, try to have the wrapper of similar geometric shape, so that when folded over it is more seamless and less overage. For example my mold happens to be in a square shape, before wetting the wrapper wrapper, With kitchen scissors, I cut the wrapper into the shape of a square. When you are doing so, be mindful you want the rice wrapper dimensions to be BIGGER than encapsulated strawberry so that it can cover it ( like a baby in a blanket).
Strawberry “DIY” Fuku with Toasted Rice Ice Cream